| Tutorial - How To… Now that you've gotten a basic understanding of the features and functions of TypeStyler, it's time to try out all those wonderful new concepts. This tutorial is a free-form exploration of TypeStyler's unique capabilities. Within the context of creating a set of travel designs, you'll engage in a little playful invention, taking advantage of TypeStyler's ease of use and flexibility to let the creative juices flow. When you finish this tutorial you'll have had some practice combining TypeStyler's various features. The techniques presented in this tutorial are fully described elsewhere in this Help Book. It is assumed that you are familiar with the basic use of the Macintosh and have installed the TypeStyler program. As you go through the tutorial don't be too concerned with perfecting the style at this point, you can change it at any time. Feel free to experiment; the possibilities are almost endless. Start by launching TypeStyler. When TypeStyler opens a new document, it defaults to a 100% view.  In this tutorial you are going to create a simple logo. You are now going to create a text object. • Select the Headline text tool, click and drag out a rectangle approximately two inches high by six inches wide (This called "growing a text box"). This will be the size of your text object. When the mouse button is released, the Text entry window will automatically appear. The name of the selected Text object shape will be in the Text entry window.  • Select and highlight the current text and type the word "California". You'll use this word as part of your design. TypeStyler uses American Typewriter as its default font; let's use a different font. • Highlight the word California and from the pulldown Font menu select a heavy san serif font such as Arial Black. The word California will change from American Typewriter to Arial Black in the text entry area. • Click outside of the the Text Attributes dialog, your text object appears selected in the Main window. It will appear with the message you typed in (California), displayed in the typeface you specified (Arial Black), in the shape (Straight) and style (Black), set to the size originally specified in the Main window (2" x 6"). 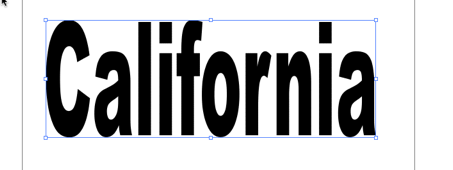 You may also adjust the spacing between individual pairs of letters if you find that two specific letters end up too close together or too far apart. This is known as a kerning and can be adjusted in the Typesetting dialog using letter Spacing under the Character tab. • Open the Typesetting dialog by selecting Typesetting from the Tool bar. Then, double click on your text object to return to the Text entry window. highlight the letter C of the word "California' in the text entry area. Select the Character tab. You will see the Letter Spacing slider. Click-dragging (click and hold down the mouse button and dragging the mouse) will allow you to manually control the amount of space between the C and the rest of the letters. Experiment to find a value that looks good. 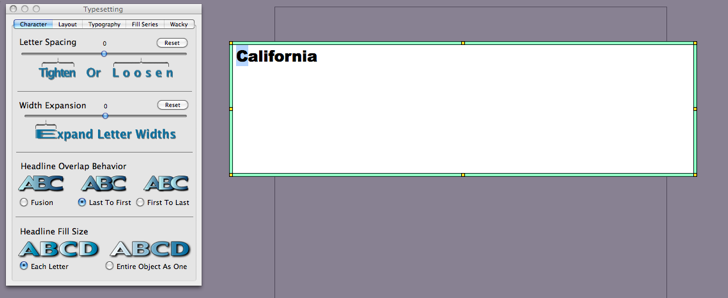 • For now, click the Reset button and return to the Main window. This kerning pair should not need adjustment. This is a good time to experiment with the text object's style. You can customize the style of an object in the Style Workshop. • Bring up the Style Workshop dialog by selecting the object and choosing Workshop from the Tool Bar (command-E). 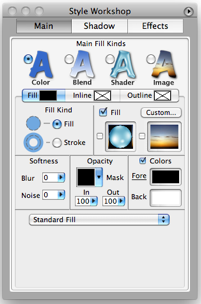 This dialog gives TypeStyler its name. From here you can create literally millions of sophisticated fill and shadow effects to be applied to objects created with TypeStyler. The Style Workshop allows you to fill letters with different pictures or patterns, control the thickness of their inlines and outlines, and add unique shadowing techniques unavailable elsewhere. You can also control the foreground and background color of each element of a style, and adjust its transparency amount. You can also add grunge and gloss effects, as well as emboss and chisel the object's edges. Let's experiment with some of the options available in this dialog. • Make sure your Text object is selected. • Under " Main Fill Kinds" click on the radio button next to the Image icon. Your Text object will now be filled will with a default image fill. Click on Custom to show the many included image fills. There are 4 tabs that include Classic, These are fills from previous versions of TypeStyler. iPhoto which will allow you to use any image from your iPhoto or Aperture libraries. Shader, which gives glossy 3-D looks. Legacy, which also includes images from previous versions of TypeStyler. • You can also add your own image by dragging and dropping an image into the drop well which is just under the Custom button in the Styler Workshop. You can experiment with this later and it will be covered in more detail in other areas of this Help Book. • For this tutorial select the grey stone pattern that is in the first column from the left and four rows down from the top. Click on the Custom button to return to the Style Workshop. 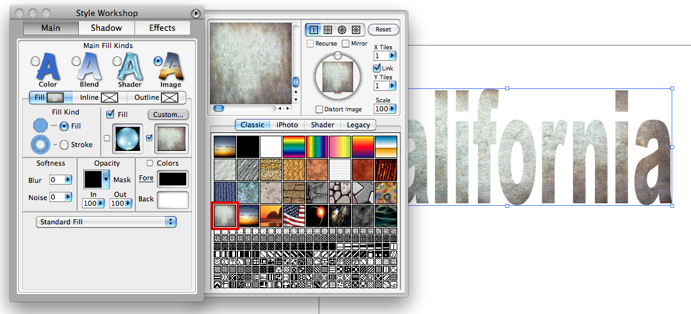 Next, let's put a black outline around the text. • Under the 4 Main Fill Kinds will 3 choices for Fill, Inline and Outline. You will click to select Outline and then click in the Outline checkbox just to the left of the Custom button. 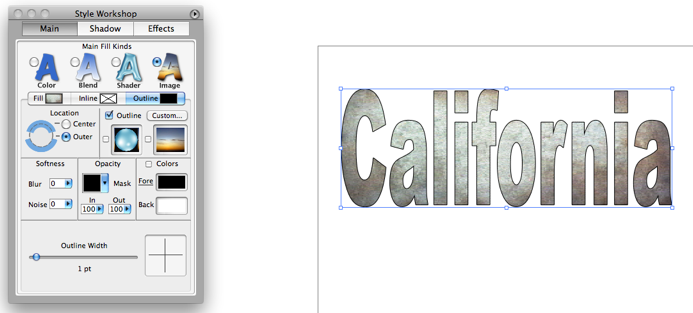 You can also add a shadow to your style. There are 4 kinds of shadows that can be applied to TypeStyler objects. Drop, Cast, Block and Zoom. • Click on the Shadow tab at the top of the Style Workshop. Click on the Shadow On/Off checkbox to to apply the shadow. The default shadow is a simple soft black drop shadow with a Fill Softness of 25%. To adjust the position of the shadow click on the Shadow Position... button to reveal the positioning controls. With the Shadow Position drawer open you can click-drag the drop shadow of your main object to control its position. You can click on the other shadow types but for this tutorial you'll use the Drop shadow. 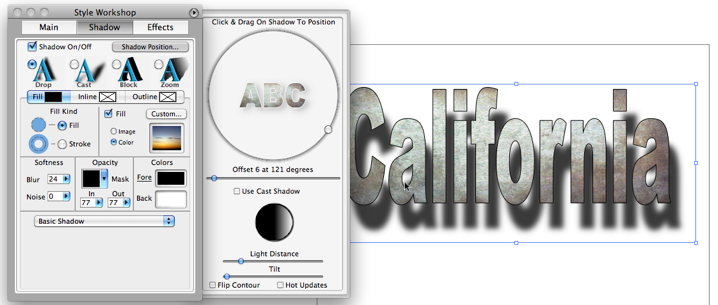 • For this tutorial chose the Drop shadow radio button and position the shadow to be just slightly offset, then close the Shadow Position window by clicking on the Shadow Position button to see the newly customized style applied to the existing text object. 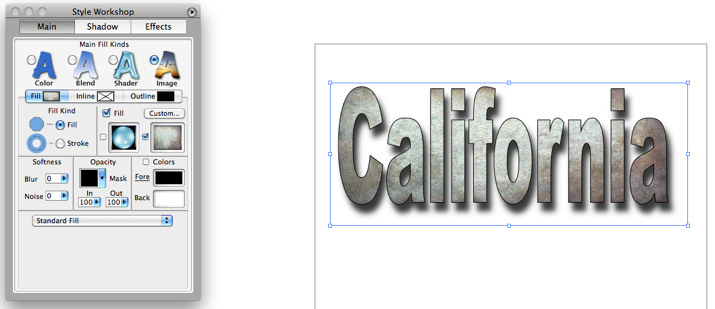 • Next you'll explore applying a "grunge" effect to the object. • Click on the Main tab and also select Fill (was on Outline) so you will be working on the main fill of the object. • Making sure your main object is still selected look near the center of the Style Workshop to see Opacity. Clicking on the arrow to the left of Mask will reveal a popup palette of Opacity Masks. Choose the bottom mask in the 3rd column. 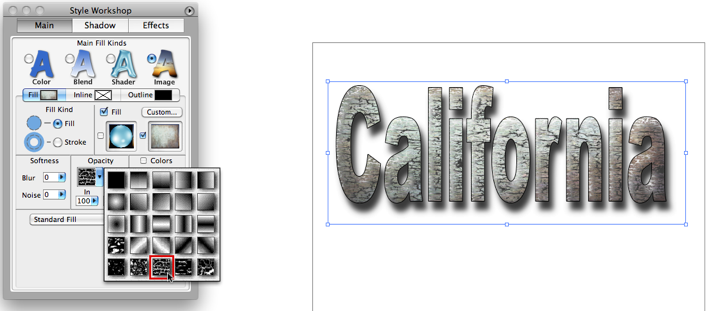 • Next click on the Effects tab at the top of the Style Workshop. Here you you will find more effects that can be combined and applied to TypeStyler objects. There is Emboss, Bevel, Distress, and Gloss. • To further the grunge effect select the Distress checkbox. Distress adds another level of effect to the object. With Distress selected there is a popup palette with even more Distress patterns that can be applied. For now just leave the default pattern. 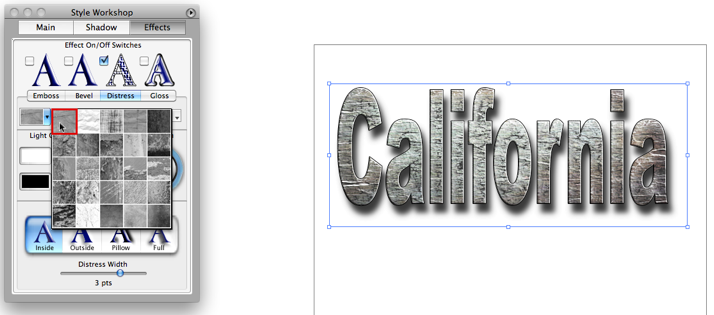 • The Effects Tab will be explored in greater detail in the Using the Style Workshop section of this Help Book. • Let's continue to explore some other parts of TypeStyler. • California is the Golden State, so let's choose the Gold style. You can use one of the included Styles to apply the gold effect. You can get to the included styles by clicking on Styles from the menu bar or by opening Styles from the Tool Bar. Your text should now repaint in gold. • The Gold fill adds width to the characters. These would look better if the letters were spaced a little farther apart. With your object still selected choose "Typesetting" from the Menu Bar. You will need to be in the Text Entry window so either double click on your object or with it selected choose Edit text from Edit menu. Command T will also open the Text Entry window. • Highlight all the characters and then using the Letter Spacing slider adjust to roughly 2. Now click outside of the entry area to return to the main screen. • With the Typesetting window still open and your object selected choose the Fill Series tab. Under the preview window is a popup menu, choose Color Letter Series. You'll see that this is added to your current style. Under Fill Series you change an image or number of colors in the array etc. • You want your text object to be all upper case letters. You could go into the Typography tab in the Typesetting window or dialog or you can simply choose All Caps from the Format menu. 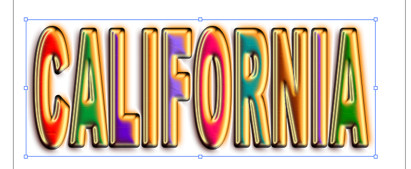 TypeStyler excels in typographic flexibility. However, all the sophisticated styling and shaping capabilities of TypeStyler can be applied to graphic objects as well. Graphic objects in TypeStyler are called panels. TypeStyler offers many shapes as panels and you can create your own custom panels using the Shape Designer. These shapes can be manipulated and styled just as text can. Panels can use the same Shape Library, Style Library, and Style Workshop as text objects and are treated in much the same way within TypeStyler. You are now going to add a panel object to use behind the existing text object in the Main window. • There are 8 panel tools on the Tool palette. Holding down the mouse button while over a tool will reveal additional choices. Select the Rounded Rectangle panel tool and click-drag a small rectangle below the text object. 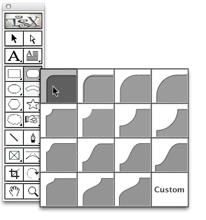 You'll now style the panel by selecting it and then choosing the Workshop button from the Tool Bar. This brings you into the Style Workshop. Panels can be styled just like text objects can. 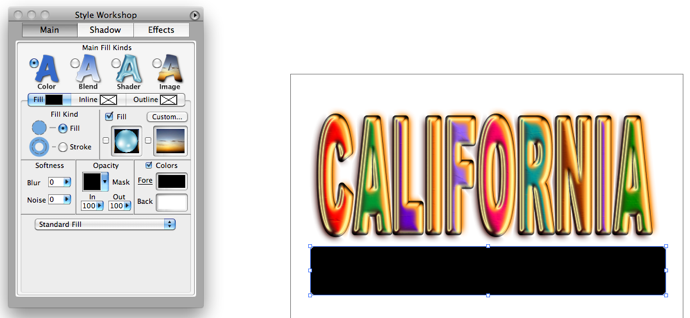 • Click on the black foreground box under Fill Colors. This brings up the Colors window. There are several palettes to choose from. With your panel object selected choose Honeydew from the box of crayons palette. 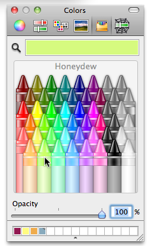 • You'll now add some texture to your panel by applying Noise. Center-left of the Style Workshop you'll see Softness. Just like the other effects within TypeStyler these setting can be combined and applied to TypeStyler objects. The Noise effect creates a random graininess or overall speckled appearance. Clicking on Noise brings up a slider, choose 50%. Then click OK to return to the Main window. • Select the Text tool from the Tool palette and position the cursor on your panel object and grow a text box approximately a half an inch high by seven inches long. • Now in the text entry area type "Discover the Golden State", and click outside of the window to return to the Main window. Save your work by choosing Save from the file menu. 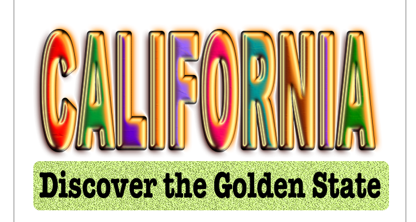 Because TypeStyler documents are always editable you can use TypeStyler documents as template for future projects. • You'll use the California graphic as the basis for another logo. • Click on the "California" text object and choose Edit Text... from the Edit menu to enter the Text entry window. Highlight California and then type Colorado. From the Distortion menu scroll and select Banner Arched Top. From the Styles menu or from the Styles in the Tool Bar scroll and select Eclipse. From the Font menu pop-up select Cooper Black. • Using the Pointer tool select the panel object. From the Distortion menu scroll and select Banner Arched Top. • Now double click on the "Discover the Golden State" message to enter the Text entry window. Change the text to read "Discover the Rockies". Click on outside to return to the Main window. 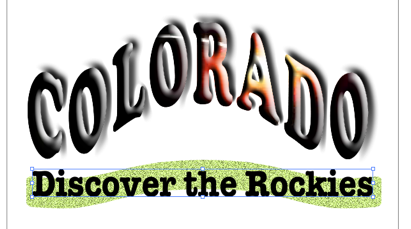 You're now going to use the Shaper tool to fine tune the message and the panel to compete the design. You can use the Shaper tool to make changes to either the shape or size of the text or panel objects. Remember that pressing the Command key will temporarily change the Shaper tool into the Pointer tool if you need to move the Panel object. • Using the Pointer tool select the panel. Now select the Shaper tool from the tool palette. Notice that the 'handles' on the panel disappear and Shaper lines appear on the top and bottom of the panel. • Select the top center control point of the panel and drag it up to match the contour or shape of "Colorado". 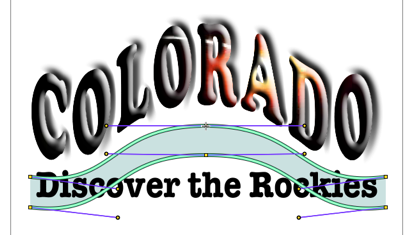 • Now using the Pointer tool select the message and scroll and select Banner Arched Top from the Shape menu. With the message still selected choose the Shaper tool again. Use the control points of the object to fit within the panel. Use the Pointer tool to reposition the objects as necessary to achieve the desired look. You may want to print, save or export your logo before continuing. 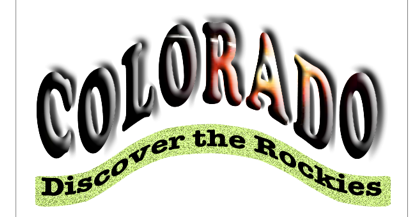 This completes the tutorial. You may want to print or save your logo before you quit TypeStyler. You may also want to go back and practice some of the TypeStyler skills you've learned. As you become more familiar with TypeStyler's keyboard commands and features you'll find that working with TypeStyler becomes an intuitive process and an integral part of your creative environment. |